Step by Step Guide to Pouring Concrete in Hot Weather
Pouring concrete is already a time-sensitive job, but high temperatures make every stage of the process move faster. Concrete can lose moisture quickly, stiffen earlier than expected, become difficult to finish, and develop cracks before the slab has had an opportunity to gain strength. When direct sunlight, low humidity, wind, and hot materials are added to the equation, even an experienced concrete crew can find itself racing against the clock.
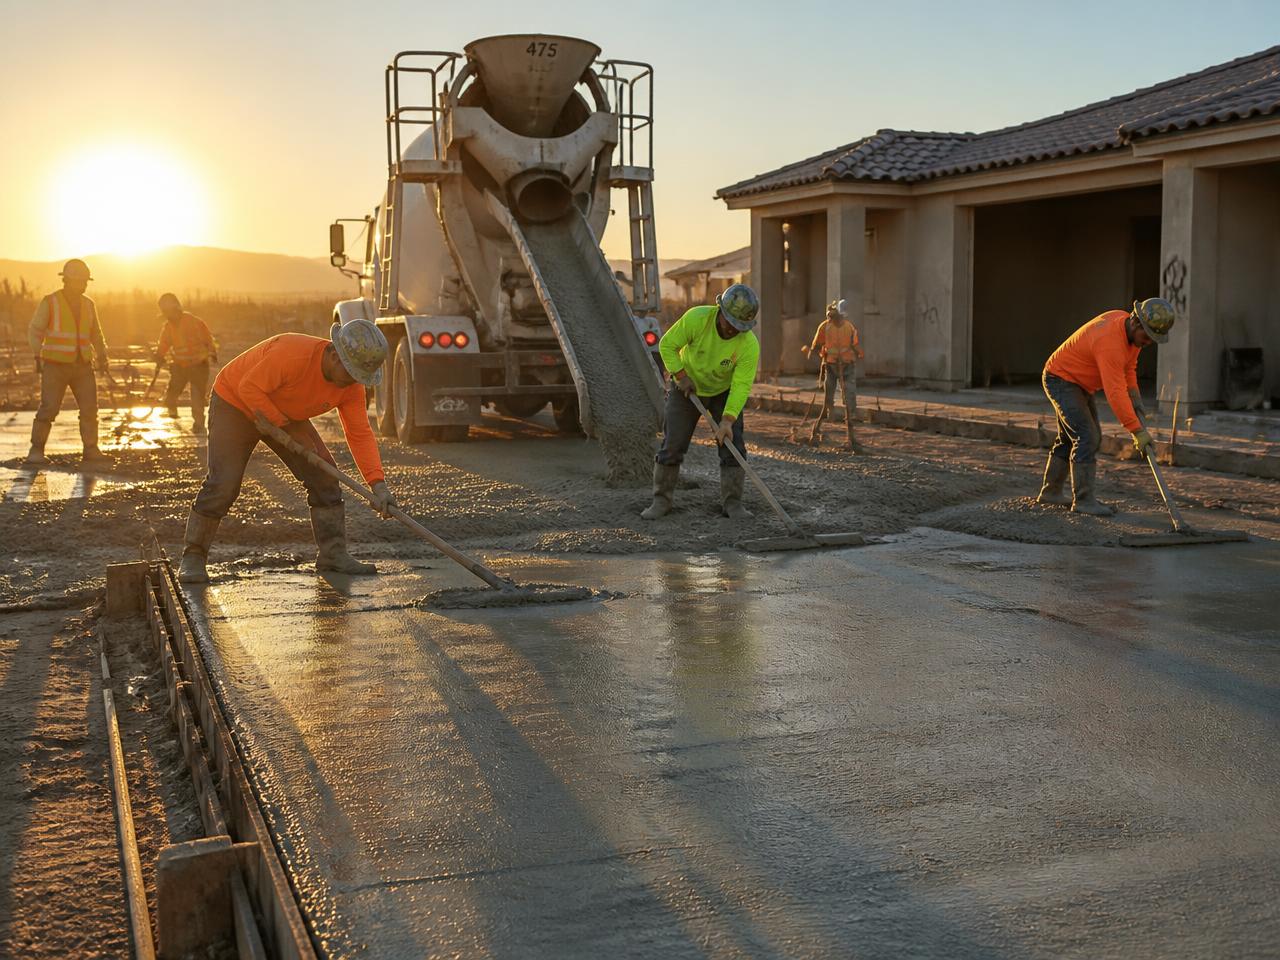
That does not mean concrete cannot be poured during the summer. In many parts of the country, waiting for cool weather is simply not realistic. Contractors in Arizona, Nevada, Texas, Florida, and other warm climates routinely place concrete in demanding conditions. The difference between a successful hot-weather pour and a damaged slab usually comes down to planning, preparation, communication, and proper curing.
Hot-weather concreting is not determined by air temperature alone. The American Concrete Institute explains that high ambient temperatures, high concrete temperatures, low relative humidity, wind, and solar radiation can all contribute to rapid moisture loss and accelerated hardening. A moderately warm but dry and windy afternoon may create more difficult conditions than a hotter morning with higher humidity and little wind.
The following step-by-step guide explains how to prepare for a concrete pour in hot weather, select the right materials, manage placement and finishing, protect the concrete afterward, and avoid the mistakes that frequently lead to cracking or poor surface quality.
STEP 1
Pouring Concrete While It's Hot
Concrete does not dry and harden in the same way as paint, glue, or wet soil. It gains strength through hydration, a chemical reaction between cement and water. Heat accelerates that reaction. As the concrete temperature rises, the mixture generally begins setting sooner, leaving less time for transportation, placement, consolidation, screeding, floating, edging, jointing, and finishing.
At the same time, moisture can evaporate from the exposed surface. When surface water disappears faster than it can be replaced by bleed water rising through the concrete, the top of the slab may begin to shrink while the concrete underneath is still plastic. This can create plastic shrinkage cracks, which often appear as relatively short, irregular, parallel cracks shortly after placement.
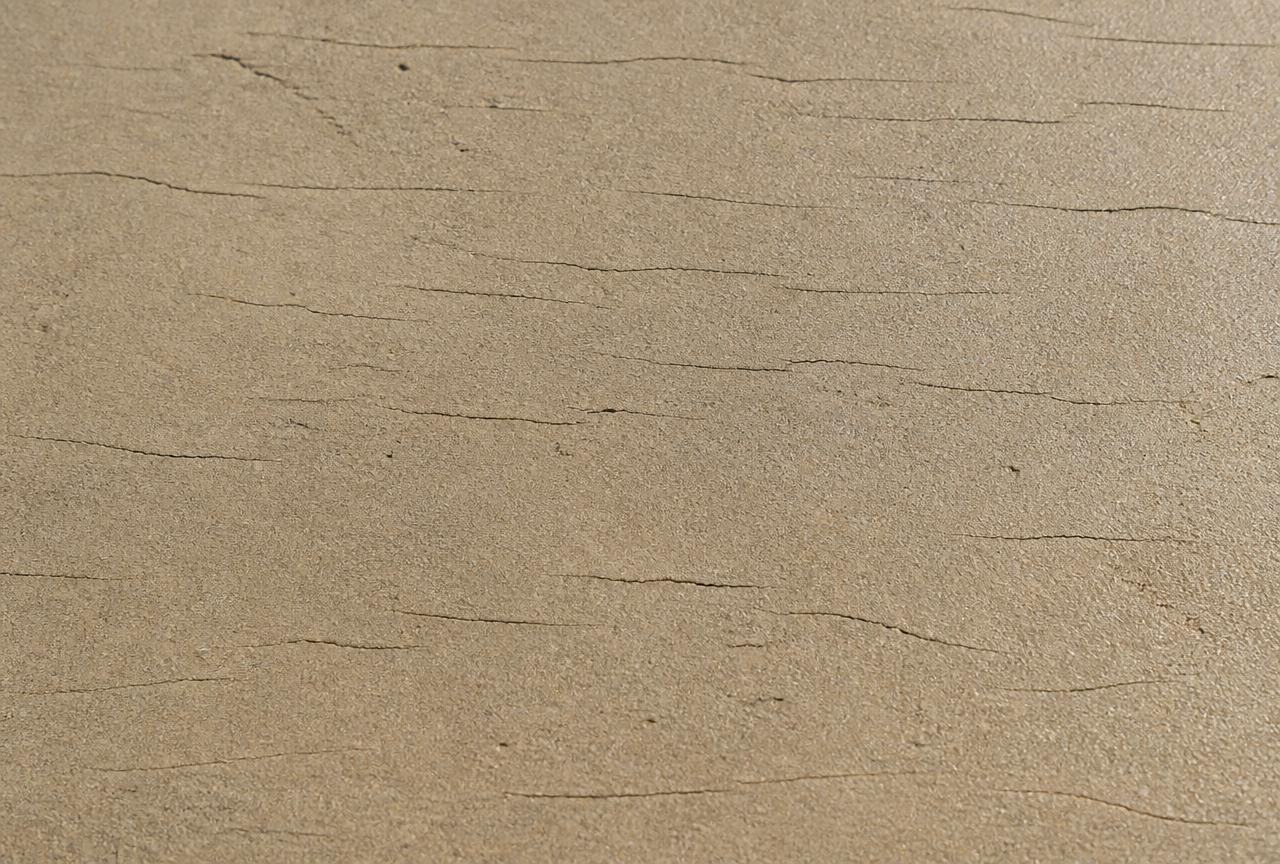
Hot-weather conditions can create several additional problems
- Faster slump loss
- Reduced working and finishing time
- Greater demand for mixing water
- Difficulty controlling entrained air
- Increased potential for cold joints
- Plastic shrinkage cracking
- Surface crusting
- Uneven finishing
- Lower long-term strength when excess water is added
- Greater risk of thermal cracking
- Reduced durability
- Inconsistent color or surface texture
Concrete placed at a high temperature may develop strength quickly during its first few days, but rapid early hydration can produce a less favorable internal structure and reduce later-age strength. That is why a slab that becomes hard quickly is not necessarily becoming better concrete.
The conditions surrounding the concrete matter just as much as the temperature displayed on a weather app. Before scheduling the pour, consider the air temperature, expected concrete temperature, humidity, wind speed, sunlight, temperature of the subgrade, length of the concrete haul, size of the placement, and number of available workers.
A shaded 10-foot sidewalk next to a house will behave differently from a large driveway exposed to direct afternoon sunlight. A small crew may be able to handle the sidewalk comfortably but become overwhelmed when placing an entire patio or commercial slab under identical weather conditions.
For structural concrete, project specifications may establish a maximum allowable concrete temperature at discharge. ACI guidance has commonly used 95°F as a maximum for many general hot-weather applications, although the actual limit must come from the project documents and responsible design professionals.
The most important lesson is that hot-weather concrete requires a complete plan. Do not treat cooling, placement, finishing, curing, or worker safety as decisions that can be made after the truck arrives.
WATCH
Hot-weather pours in under two minutes
STEP 2
Choosing the Right Time
The easiest way to reduce the effects of hot weather is to schedule the pour during the coolest practical part of the day. For many projects, this means placing concrete early in the morning. In extremely hot climates, contractors may choose overnight or predawn placement when local regulations, jobsite access, lighting, and ready-mix availability allow it.
An early start provides several advantages. The subgrade, forms, reinforcing steel, tools, and surrounding pavement have had several hours to cool overnight. The concrete is also less likely to be exposed to peak sunlight during its most vulnerable early period.
However, simply scheduling the truck for 6:00 a.m. does not guarantee that placement will begin at 6:00. The entire job must be ready before the truck arrives. Excavation, grading, compaction, formwork, reinforcement, vapor barrier installation, access planning, and tool setup should be completed in advance whenever possible.
Review the hourly forecast instead of looking only at the expected daily high. Pay attention to:
Check the hourly forecast for
- Temperature at the planned placement time
- Humidity
- Wind speed and gusts
- Cloud cover
- Sunrise
- Expected temperature increase
- Thunderstorm potential
- Heat advisories
- Overnight low temperature
Discuss with your ready-mix supplier
- Requested delivery time
- Expected travel time
- Required concrete temperature
- Desired slump
- Placement method
- Anticipated discharge time
- Approved admixtures
- Whether chilled water or ice is available
- Project specifications
- Backup plans for traffic or equipment delays
Wind deserves special attention. A steady breeze may feel comfortable to the crew, but it can pull moisture away from exposed concrete. High heat, low humidity, and wind are an especially damaging combination.
For a large or critical placement, the crew may need to evaluate the expected evaporation rate rather than relying on air temperature alone. Evaporation calculations consider air temperature, concrete temperature, relative humidity, and wind speed. ACI hot-weather guidance discusses monitoring evaporation and adjusting placement practices when conditions increase the likelihood of rapid surface moisture loss.
Communication with the ready-mix supplier is also essential. Tell the supplier that the concrete will be placed in hot weather and discuss the items above.
Truck spacing should match the crew's placement speed. Ordering trucks too close together can leave concrete waiting in the drum while the crew struggles to catch up. Ordering them too far apart can allow previously placed concrete to stiffen before the next load arrives, creating a cold joint.
The pour size should also match the available labor. Hot weather is a poor time to stretch a small crew across an oversized slab. It may be better to divide the project into planned placements than to risk losing control of one large pour.
Worker safety
Finally, account for worker safety. Concrete placement and finishing are physically demanding, and heat stress can reduce judgment, coordination, and productivity. OSHA recommends providing cool water, access to shade or cooled areas, appropriate rest periods, and electrolyte-containing fluids for work lasting two hours or longer. Workers should drink regularly rather than waiting until they feel thirsty.
STEP 3
Preparing the Site
Preparation is always important, but it becomes critical when concrete will begin setting quickly. Once placement starts, there may not be enough time to locate missing tools, correct forms, repair a pump, or assign responsibilities.
Begin by checking the forms. They should be secure, properly aligned, adequately braced, and set to the correct elevation. A form that moves during a hot-weather pour can consume valuable working time and force finishers to correct the problem while the concrete continues to stiffen.
Confirm that the subgrade is properly graded and compacted. Soft spots, loose soil, organic material, and uneven support can contribute to settlement and cracking. Install the required aggregate base, vapor retarder, reinforcement, dowels, isolation material, sleeves, drains, embeds, and blockouts before the scheduled placement.
Dampen the base — never flood it
The subgrade should not be dry enough to immediately pull water from fresh concrete. A dry, absorbent base can accelerate moisture loss from the bottom of the slab while the sun and wind remove moisture from the top. When permitted by the project specifications, lightly dampen an absorptive subgrade before placement. The goal is to create a uniformly moist surface without puddles, standing water, mud, or saturated weak areas. Concrete should never be placed directly into pooled water.
Shade everything you can
Forms and nearby porous surfaces may also be dampened when appropriate. Steel forms, reinforcement, tools, pump lines, and equipment exposed to direct sunlight can become extremely hot, so shading them before the pour can reduce the amount of heat transferred to the concrete. Temporary shade can make a major difference. Shade the placement area with canopies, sunshades, tarps, or other structures that do not interfere with the crew. Shade may also be used over material staging areas, pump equipment, testing areas, and finishing supplies.
Set windbreaks before you pour
Windbreaks can be installed along the upwind side of the slab. These may consist of temporary fencing, plastic sheeting, plywood panels, or fabric barriers. They should be positioned securely so they do not collapse or blow debris onto the concrete. Do not wait until cracks begin appearing to install shade or wind protection. Protective measures must be ready before placement starts.
Organize all tools in the order they will be needed
- Concrete rakes or come-alongs
- Shovels
- Vibrators
- Screeds
- Bull floats
- Hand floats
- Edgers
- Groovers
- Fresno trowels
- Power trowels
- Brooms
- Sprayers
- Evaporation reducer
- Curing compound
- Wet coverings
- Plastic sheeting
- Saw-cutting equipment
- Backup batteries, fuel, and blades
Every crew member should understand the sequence of work. Assign workers to direct the chute or pump hose, spread concrete, consolidate edges and penetrations, screed, bull float, edge, joint, finish, apply curing materials, and clean tools. A clear division of responsibility prevents several workers from concentrating on one area while another section is neglected.
Equipment should be tested before the truck arrives. Start the power screed, vibrator, pump, power trowel, misting equipment, and saw. Confirm that hoses are connected, sprayers operate correctly, and backup equipment is available.
Plan truck and pump access carefully. Delivery vehicles should be able to enter, discharge, wash out, and leave without unnecessary delays. If the truck must reposition several times, determine the route beforehand.
The crew should also establish a method for monitoring conditions. At minimum, assign someone to watch concrete consistency, placement progress, wind, surface drying, and the condition of completed areas. Large or specification-driven projects may require formal temperature, slump, air-content, and test-cylinder procedures.
STEP 4
Having the Right Concrete Mix
A successful hot-weather pour begins before the concrete reaches the jobsite. The mixture must provide adequate strength, durability, finishability, and working time without encouraging workers to add excessive water.
The ready-mix supplier should be involved early. Experienced producers can adjust materials, production methods, delivery scheduling, and admixture dosage based on the weather, travel time, placement method, and project requirements.
Concrete temperature can be reduced by controlling the temperature of its ingredients. Because aggregates and water make up a large portion of the mixture, cooling these materials can substantially reduce the delivered concrete temperature.
Possible production measures
- Shading aggregate stockpiles
- Sprinkling coarse aggregate with controlled amounts of water
- Using chilled mixing water
- Replacing a portion of the mixing water with ice
- Shading or insulating storage equipment
- Scheduling production during cooler hours
- Minimizing unnecessary truck waiting time
Any water added while cooling aggregate must be measured and accounted for in the mixture. Uncontrolled moisture changes can alter the water-cementitious materials ratio and concrete consistency. NRMCA quality-control guidance identifies sprinkling coarse aggregate stockpiles as one method used to cool materials for hot-weather concreting.
Chemical admixtures can improve workability and extend setting time without requiring additional water. A water-reducing admixture can provide the required slump while maintaining the intended water-cementitious materials ratio. A retarding or hydration-stabilizing admixture may provide additional placement and finishing time.
However, admixtures should be selected and dosed by the concrete producer in accordance with the approved mixture design. More retarder is not automatically better. Excessive or inconsistent dosage can create delayed setting, uneven finishing conditions, or problems between separate truckloads.
The mixture must also suit the placement method. Pumped concrete may require different proportions and consistency than concrete placed directly from a chute. Decorative concrete, stamped concrete, industrial floors, sidewalks, driveways, and structural slabs have different performance requirements.
DON'T DO THIS
One of the worst hot-weather practices is adding unapproved water at the jobsite simply because the concrete appears stiff.
Adding water can temporarily increase slump, but it may also:
- Raise the water-cement ratio
- Reduce strength
- Increase shrinkage
- Increase permeability
- Reduce resistance to surface wear
- Affect air content
- Cause inconsistent appearance
- Increase segregation
- Contribute to dusting or scaling
The concrete ticket should identify the approved mixture, batch time, water allowance, admixtures, and other relevant information. Only authorized personnel should direct adjustments, and any permitted addition must be properly measured and mixed.
Concrete should not be ordered excessively wet in an attempt to compensate for heat. A higher initial slump does not replace proper scheduling, cooling, placement, and curing.
It is equally important to avoid mixtures that are unnecessarily harsh or difficult to finish. The right balance depends on slab thickness, aggregate grading, reinforcement congestion, placement distance, finishing method, and exposure conditions.
Before the pour, confirm the required
- Compressive strength
- Slump range
- Air content
- Maximum aggregate size
- Fiber dosage
- Cementitious materials
- Admixtures
- Concrete temperature
- Exposure classification
- Finishing requirements
- Curing method
Changes should be coordinated with the supplier and project authority rather than improvised at the slab.
STEP 5
Finishing Before Concrete Sets
Finishing is often the stage where hot-weather planning either pays off or falls apart. The crew must move efficiently, but moving efficiently is not the same as rushing blindly.
Place the concrete as close as possible to its final location. Avoid depositing one large pile and dragging the material long distances, which can encourage segregation and waste valuable time. Keep the leading edge of the placement active and maintain a consistent sequence.
Concrete should be consolidated around reinforcement, forms, corners, penetrations, and embedded items. Internal vibration may be required for structural placements, but over-vibration can cause segregation. Flatwork that is properly proportioned and placed may require different consolidation techniques around edges and obstructions.
Begin screeding as soon as enough concrete has been placed. Do not allow a large area to accumulate before striking it off. Screeding establishes the initial elevation and removes excess material.
Bull floating or darbying should follow promptly. This step helps embed large aggregate, remove screed ridges, and prepare the surface for later finishing. Overworking the surface should be avoided.
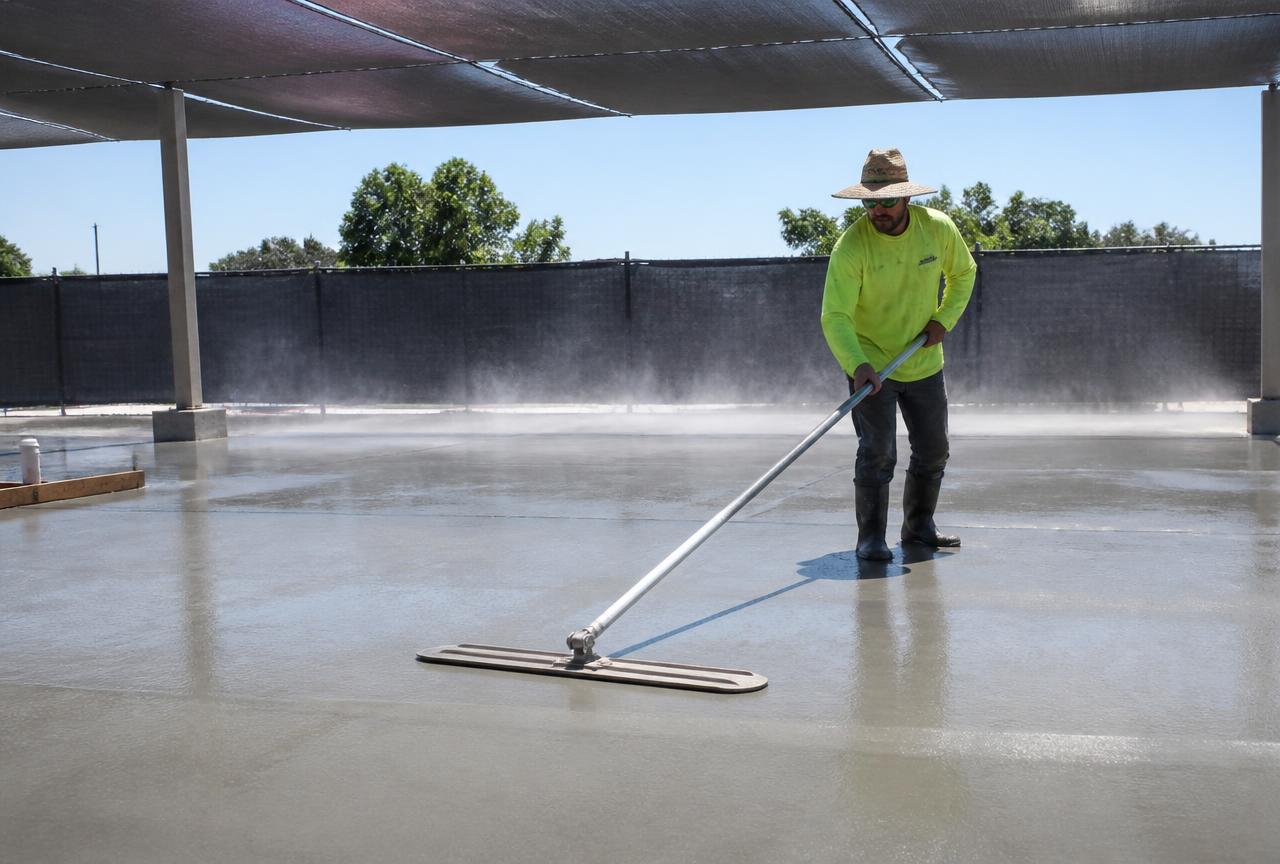
The next timing decision is critical: finishers normally wait for bleed water to evaporate and for the concrete to support finishing operations. Finishing while bleed water remains can trap water beneath the surface and contribute to blistering, delamination, dusting, scaling, and a weak surface layer.
Hot weather complicates this process because the surface can look dry even though bleeding has not finished. Sun and wind may create a crust while the concrete below remains soft. This is known as surface crusting.
A crusted surface may support a finisher briefly but tear, ripple, or crack under tools while the underlying concrete shifts. Finishers must evaluate the slab carefully rather than assuming that a dry appearance means the concrete is ready.
Never sprinkle water onto the surface to make finishing easier. Working added water into the slab can weaken the surface, alter its color, and increase the risk of scaling or dusting.
An evaporation-reducing product may be applied as directed by its manufacturer to help limit rapid surface moisture loss. These products are sometimes called evaporation retarders, finishing aids, or monomolecular films. They are not curing compounds and do not replace final curing.
Fogging may also be used to increase humidity above the slab and reduce evaporation. The fog should remain suspended above the concrete rather than depositing large water droplets on the surface. Improvised spraying that leaves water on the slab can create more problems than it solves.
Edging and jointing
Edging and hand jointing should begin while the concrete remains workable enough to form clean lines without tearing. Control joints must be placed according to the slab design. Joint depth, spacing, and layout should be determined before placement rather than decided while finishers are under pressure.
Saw-cut joints
When saw-cut joints are specified, cutting must begin as soon as the concrete is strong enough to resist raveling but before random shrinkage cracks occur. Hot weather can shorten this window considerably. Early-entry saws may be useful for certain slab applications, but cutting procedures should match the project requirements and equipment manufacturer's instructions.
Broom finish
For a broom finish, apply the texture when the surface is firm enough to hold the pattern without tearing or collecting paste. Broom consistently in the intended direction and avoid repeatedly reworking areas that have already begun setting.
Power troweling
Power troweling requires equally careful timing. Starting too early can disturb the surface and trap moisture. Starting too late may prevent the blades from closing and smoothing the surface. Make sure the power trowel is fueled, tested, and positioned nearby before it is needed.
Workers should avoid over-troweling exterior air-entrained concrete. A dense, hard-troweled surface may be unsuitable for exterior slabs exposed to moisture and freezing conditions. Follow the specified finish rather than attempting to make every slab glass-smooth.
Large placements may need multiple finishing crews working in zones. The finishing sequence should follow the placement direction so no area is abandoned. Designate one experienced person to monitor the entire slab and adjust labor as conditions change.
When the concrete is getting away from the crew, adding water or aggressively reworking the surface will not reverse the setting reaction. The correct response is prevention: reduce the pour size, improve truck spacing, increase labor, cool the concrete, use approved admixtures, and start earlier.
STEP 6
Protecting the Concrete
Finishing is not the end of the pour. Curing begins immediately after the surface is ready and may be the most important step in hot-weather concreting.
Curing maintains moisture and favorable temperature conditions so hydration can continue. Without adequate curing, the surface may dry rapidly, reducing strength and increasing permeability, shrinkage, dusting, and cracking.
The curing method must be selected before placement. Common methods include:
- Liquid membrane-forming curing compounds
- Wet burlap or approved fabric
- Curing blankets
- Plastic sheeting
- Continuous water curing
- Ponding
- Sprinklers or soaker hoses
- A combination of moisture retention and shading
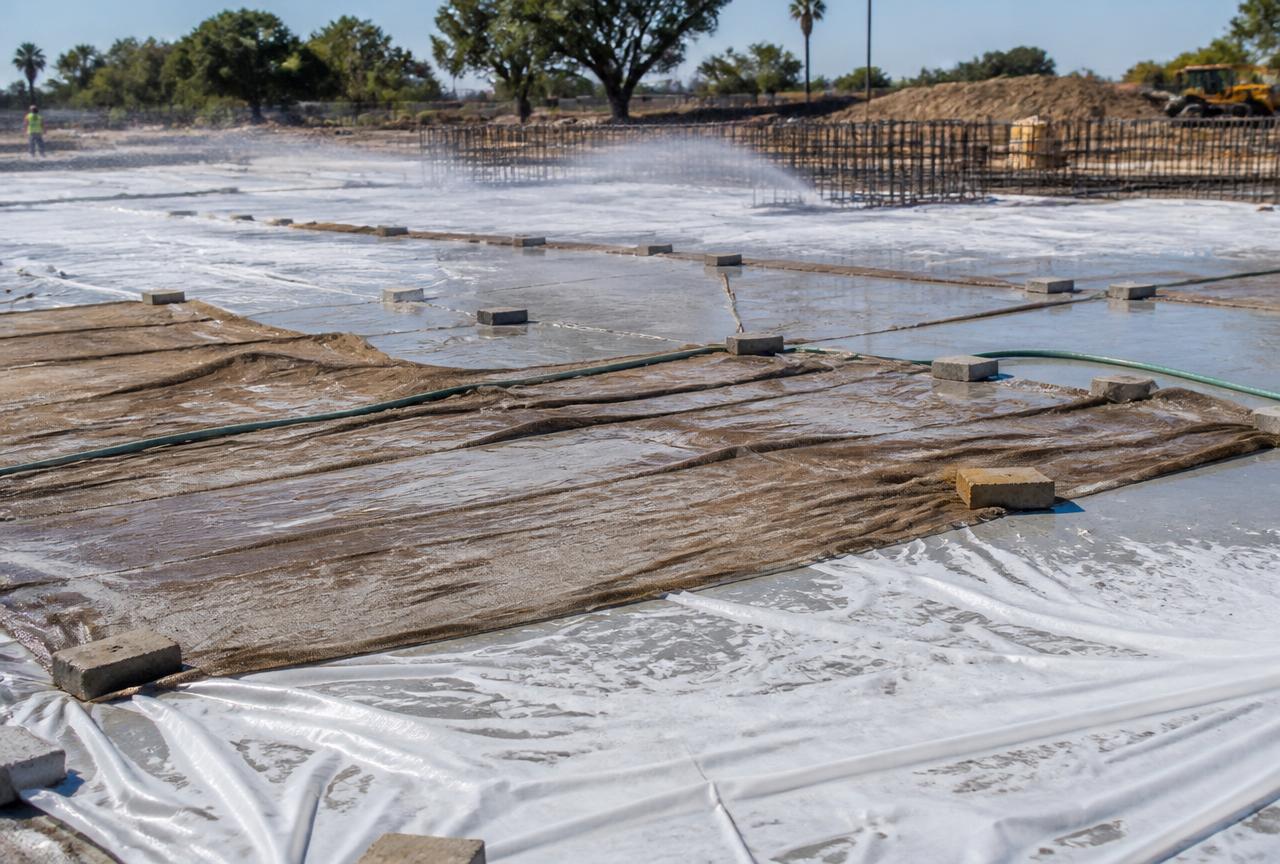
A curing compound must be compatible with any later sealer, coating, adhesive, stain, or surface treatment. Some products can interfere with adhesion and may need to be removed.
Apply the curing compound uniformly at the manufacturer's recommended coverage rate. Thin spots, missed edges, footprints, and uneven application reduce its effectiveness. Some applications require a second coat applied at right angles to the first.
Wet coverings must remain continuously moist. Allowing burlap or fabric to dry can draw water from the concrete. Coverings should be placed without damaging the finished surface and secured so wind cannot lift them.
Plastic sheeting is effective at reducing evaporation, but wrinkles can produce uneven color or marks on decorative and architectural concrete. White or reflective coverings may be preferable under intense sunlight because darker materials can absorb heat.
Avoid suddenly applying very cold water to hot concrete. Severe temperature differences may create thermal stress. ACI guidance notes that excessive evaporation during water curing and related cooling effects can contribute to cracking, which is one reason plastic coverings or other controlled curing methods may be selected.
Protect the slab from traffic, equipment, pets, landscaping work, and other trades. Concrete may appear hard at the surface while remaining vulnerable to loading and impact.
Forms can also help retain moisture along slab edges. Removing them too soon may expose fresh concrete to rapid drying. Follow the project's stripping requirements rather than removing forms only because the surface looks firm.
Curing duration depends on the mixture, cementitious materials, weather, slab type, exposure, and specifications. Do not assume that one day is enough simply because the concrete set quickly. Fast setting is not the same as complete hydration.
Continue monitoring the slab after placement. Look for:
- Plastic shrinkage cracks
- Dry or uncovered areas
- Lifted plastic
- Dry curing blankets
- Uneven curing-compound coverage
- Unexpected surface discoloration
- Edge damage
- Early random cracking
- Standing water
- Signs of thermal stress
Small plastic shrinkage cracks may sometimes be closed while the concrete is still plastic, but repairs should be handled carefully. Once the material has hardened, random cracks should be evaluated before cosmetic repair. Filling a crack without determining whether it is active, structural, or moisture-related can conceal rather than solve the problem.
The slab must also be protected from rapid temperature changes. A surface heated by direct afternoon sun may cool quickly after sunset or during a sudden storm. Shade, coverings, and controlled curing can moderate these changes.
AVOID THESE
Common Mistakes
Hot-weather concrete failures are rarely caused by one dramatic error. More often, several small mistakes combine until the crew loses control of the placement.
Starting Too Late
Scheduling the truck near midday exposes the concrete to rising temperatures, direct sunlight, and hot site materials. Whenever practical, begin during the coolest part of the day and complete preparation beforehand.
Ignoring Wind and Humidity
A contractor may postpone a pour when the forecast reaches 105°F but proceed without concern at 90°F on a dry, windy day. Temperature alone does not determine evaporation risk. Evaluate the complete weather picture.
Ordering Too Much Concrete at Once
Large placements require enough labor, equipment, access, and finishing capacity. Reducing the number of trucks does not necessarily make the pour easier if each load covers more area than the crew can manage.
Poor Truck Spacing
Concrete waiting in a truck can lose workability, while long gaps between trucks can create cold joints. Coordinate production and delivery with the crew's realistic placement speed.
Adding Excess Water
Water is not a substitute for a proper mixture or approved admixture. Uncontrolled water addition can reduce strength and durability while increasing cracking and surface defects.
Pouring Over a Hot, Dry Base
A sun-baked subgrade or absorptive surface can remove moisture from the concrete. Shade and dampen suitable surfaces when permitted, but eliminate puddles and standing water.
Leaving Tools Unprepared
A missing edger, empty power-trowel fuel tank, clogged sprayer, or dull saw blade can cost the crew the exact few minutes it needed to finish successfully.
Shop replacement bladesUnderstaffing the Job
Hot weather reduces working time and increases physical stress. A crew sized for mild spring weather may be unable to manage the same slab in midsummer.
Finishing Over Bleed Water
A surface that looks dry may still be bleeding beneath a thin crust. Finishing too early can trap moisture and weaken the surface.
Sprinkling Water on the Surface
Adding water to make troweling easier may create discoloration, dusting, scaling, blistering, and a weakened surface layer.
Using Curing as an Afterthought
Curing supplies must be onsite and ready before placement. Waiting until the next morning to buy plastic or curing compound may leave the slab exposed during its most vulnerable period.
Forgetting Worker Heat Safety
Dehydrated or overheated workers make slower decisions and are more likely to miss finishing windows or operate equipment unsafely. Provide water, rest, shade, and a heat-response plan. Stop work and seek appropriate assistance when a worker shows signs of heat illness.
Assuming Faster Strength Gain Means Better Concrete
Concrete that sets quickly can feel strong early while developing reduced later-age strength or durability. The goal is controlled hydration, not simply making the surface hard as fast as possible.
FINAL THOUGHTS
Respect the shortened timeline
Pouring concrete in hot weather is a challenge, but it does not have to become a gamble. Successful placement depends on controlling as many variables as possible before the first truck reaches the site.
Choose the coolest workable placement time. Coordinate closely with the ready-mix supplier. Prepare the forms, base, tools, shade, windbreaks, curing materials, and labor in advance. Use an appropriate concrete mixture and approved admixtures instead of relying on extra water. Place the concrete efficiently, finish it according to its actual condition, and begin curing as soon as the surface allows.
Most importantly, respect the shortened timeline created by hot weather. During a mild pour, a small delay may be inconvenient. During an extremely hot, dry, or windy pour, the same delay can affect the appearance, strength, and service life of the entire slab.
A crew cannot control the weather, but it can control when the pour begins, how the site is prepared, what mixture is ordered, how quickly the concrete is placed, and how thoroughly the finished slab is protected. Those decisions make the difference between concrete that merely becomes hard and concrete that performs as intended for years.
Frequently Asked Questions
Concrete Equipment for Every Single Pour
Best price guarantee — only at bladesasap.com!